Pekka Buttler (Updated November 2025)
Introduction
Anyone who’s been active on a photography forum for any length of time, has certainly stumbled upon a concerned poster showing pictures of how dust-filled their lens is, and then asking what can be done about it. Typically, among those who answer the poster, there will be a lot of people recommending getting the lens cleaned, as well as a group which tries to convince the original poster, that they have very little to be worried about.
Should you find me participating in that discussion, you will most probably find me in the later group. In this article, I explain why that is. Incidentally, this article also explains why I have (in this series of articles) repeatedly said that fungus/scratches/separation coating loss most often has very little to no effect on pictures.
Now, in case you are asking “how can some people think dust is bad and should be cleaned, while others say it’s nothing to worry about…?” The reason is simply that many do not know enough about how lenses work. Moreover, this ignorance is not reserved only for amateurs, as I know many professional photographers who do not know either.
Before we go on, a mild warning is in order: This might – at times – get a tad technical. I’m not going to dazzle you with formulas, instead I will try to explain things verbally, and as simply as possible. Still, optics are not always easy to simplify, so if you read this and do not understand, don’t feel stupid. Thinking about this stuff just takes some time getting used to.
What lenses are, and aren’t; and why that might make a difference
First, some terminology: a photographic lens (a.k.a. objective) is the entire group of optics (lens elements) including diaphragm that define the optical characteristics of the lens. A lens element is a single piece of glass within a lens, that has the effect of bending light in some way. In many lenses, some lens elements are cemented together to act as one, and form a group. Cementing and groups was discussed in the article on element separation.
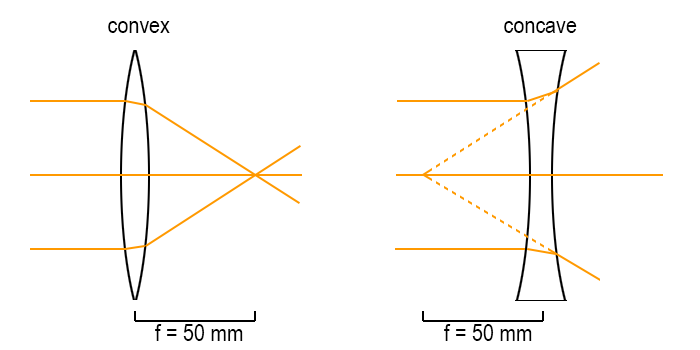
Any singular lens element has a focal length, which is the distance from the middle of the lens element to the point at which rays converge (on in the case of a concave lens, the imaginary origin of the diverging rays).
The (slightly counterintuitive) aspect of lenses elements, is that the glass of the lens element does not actually bend light rays, but all the bending is done by the lens element surfaces. In technical terms these surfaces are often called ‘optical interfaces’ to underline the nature of transition, and to remind of that there are more than one type of transition. Instead of only thinking about transitions between “air and glass” (albeit bidirectionally) there are also transitions between the different types of glass in a doublet.
Don’t worry, I won’t dazzle you by discussing refractive indexes (a measurement of how strongly light is bent) of various mediums or go into dispersion and Abbe numbers (but if you want to read more about that, check out the JAPB article on chromatic aberrations). Suffice it to say here, that the amount of bending that happens at an optical interface depends on only two factors, the angle at which light hits the interface and the type of transition (air-glass, crown-flint or glass-fluorite etc.).
Also, most illustrations of how a lens works do not show how each air-glass interface bends light, and if they do, the visualisation typically shows either only a single light-point, shows only two paths or highlights some aberration. Any realistic visualisation would quickly go beyond what us mere mortals could comprehend, especially as when you start combining several lens elements of several forms and types, some odd stuff starts happening1, on top of which our preconceptions might conspire to fool us2.
Most importantly, light from each single point (in the vista you are photographing) hits the entire surface of your front lens element of your lens, is bent, hits a significant part of the back surface, heads straight for the next lens element and so on. This means that lenses first jumble together all the different light rays, only for them to exit the back lens element nicely separated. In practice, this means that if a portion of a lens element surface is covered by dust or debris, the rest of the lens element’s surface will be able to do a lot to compensate for it. This does not mean that dirt and debris can not be visible in the final image, but it is quite unlikely.
I think the best illustration of how lenses are able to compensate for dirt and debris is given through a somewhat extreme experiment:
“Visible” dirt ?
Naturally, the biggest worry both amateur and pro photographers have is that by not cleaning their lens, they will end up using excruciating hours in post-production, cleaning blotches and dots away from their money shots. I will try to assuage some of those fears, because the simple fact is that normal dirt and even minor debris inside the lens rarely manages to show up on the final image. This section will demonstrate and try to explain why that is.
Firstly, even though you have a nice, round front lens element, not all of that element is used in forming the picture on the lens/sensor. In fact, a lot of the lens is simply there, because it is easier to manufacture the entire lens (and not only those parts which participate in forming the picture on the film/sensor).
The position of the scrap of post-it above is such, that its lowermost edge barely appears on the sensor (at any apeture). Incidentally, this is why fungus around element edges or element separation around the edge of a lens element typically in no way affect your pictures.
Okay, you say, “What about when the blemishes are in the middle of the lens element?” Good question. So, let’s up the ante. Let’s put a post-it close to the middle of the lens. Now, it must surely show?
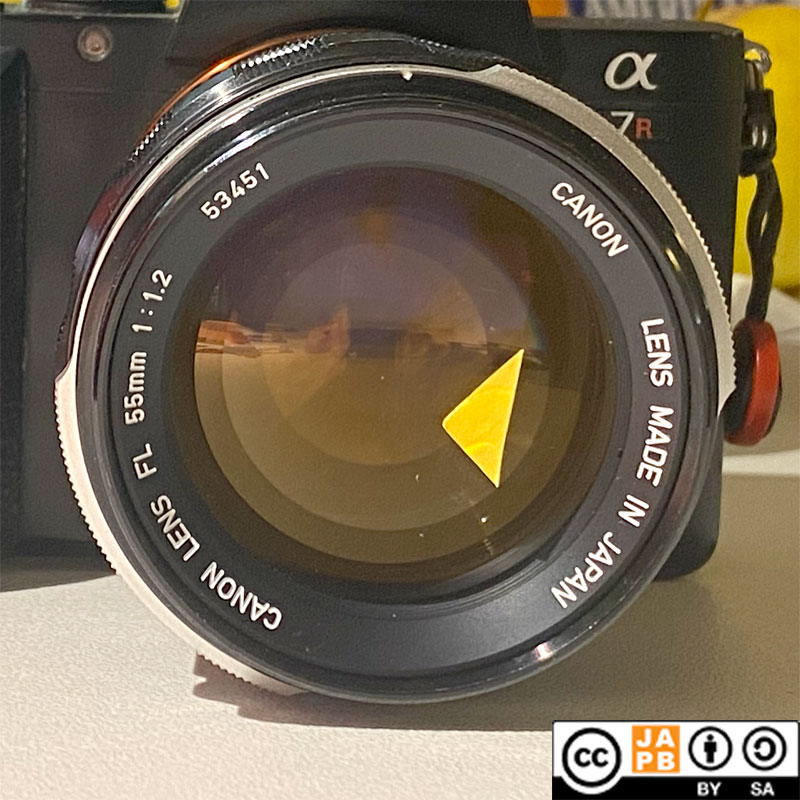
And depending on your selected aperture, it is visible or it is not Below are two galleries (one at portrait distance and another at landscape distance (Sony ⍺7R2, Canon FL 55/1.2, ACR Default, resize to 2048, JPEG Quality 60). No cropping (!)
Portrait distance


Sony ⍺7R2, Canon FL55/1.2@ f/1.4, 1/30 s, ISO160

Sony ⍺7R2, Canon FL55/1.2@ f/2, 1/30 s, ISO250

Sony ⍺7R2, Canon FL55/1.2@ f/2.8, 1/30 s, ISO640

Sony ⍺7R2, Canon FL55/1.2@ f/4, 1/30 s, ISO1250

Sony ⍺7R2, Canon FL55/1.2@ f/5.6, 1/30 s, ISO2500

Sony ⍺7R2, Canon FL55/1.2@ f/8, 1/25 s, ISO3200

Sony ⍺7R2, Canon FL55/1.2@ f/11, 1/13 s, ISO3200

Sony ⍺7R2, Canon FL55/1.2@ f/16, 1/6 s, ISO3200
Landscape distance

Sony ⍺7R2, Canon FL55/1.2@ f/1.2, 1/2500 s, ISO100

Sony ⍺7R2, Canon FL55/1.2@ f/1.4, 1/2500 s, ISO100

Sony ⍺7R2, Canon FL55/1.2@ f/2, 1/1250 s, ISO100

Sony ⍺7R2, Canon FL55/1.2@ f/2.8, 1/800 s, ISO100

Sony ⍺7R2, Canon FL55/1.2@ f/4, 1/400 s, ISO100

Sony ⍺7R2, Canon FL55/1.2@ f/5.6, 1/200 s, ISO100

Sony ⍺7R2, Canon FL55/1.2@ f/8, 1/100 s, ISO100

Sony ⍺7R2, Canon FL55/1.2@ f/11, 1/50 s, ISO100
Sony ⍺7R2, Canon FL55/1.2@ f/16, 1/30 s, ISO125
The simple reason for why the post-it does not show in the first pictures (but starts being visible in the later pictures) is related to depth-of-field. “depth-of-field” or DOF is photo lingo for “depth of the field of sharpness” and describes the slice of distance from sensor/film that is reasonably sharp (this topic may be worth an article at a later date).
In the case of a 55 mm lens set to f/1.2, focused on 1,3 meters, mounted on a Sony a7R2, depth of field is about three centimeters, which means that the lens manages to draw a reasonably sharp image (in the centre) only of objects which are (roughly) between 59 cm and 62 cm distant. With the post-it being at roughly 9 cm, it’s simply too far outside the sharp area to show.
Closing down the aperture significantly increases the depth-of-field, until at f/16, DOF reaches roughly 45 cm, meaning that the reasonably sharp slice of reality starts at 100 cm and goes all the way to 145 cm. The post-it is still waaay too close to be in focus, but now it is “close enough” to the sharp area to show up, but with heavily blurred edges.
In fact, the post-it shows in the picture simply because it is so large. At roughly 1000 times the area of even bigger specks of dust, the post-it creates a clearly visible blemish, whereas none of those scratches or dandruff flakes ever will. Period.
But wait. This does not mean that scratches or specks of dirt will never show up. Ceteris paribus (other things being equal), wider-angle lenses always produce a deeper depth-of-field. So if you understood what I mentioned above about the significance of depth-of-field, then you might already guess what I’m going to say next: The likelihood of dirt (or specks or scratches) to show up depends on the focal length of the lens (and the aperture used, etc.).

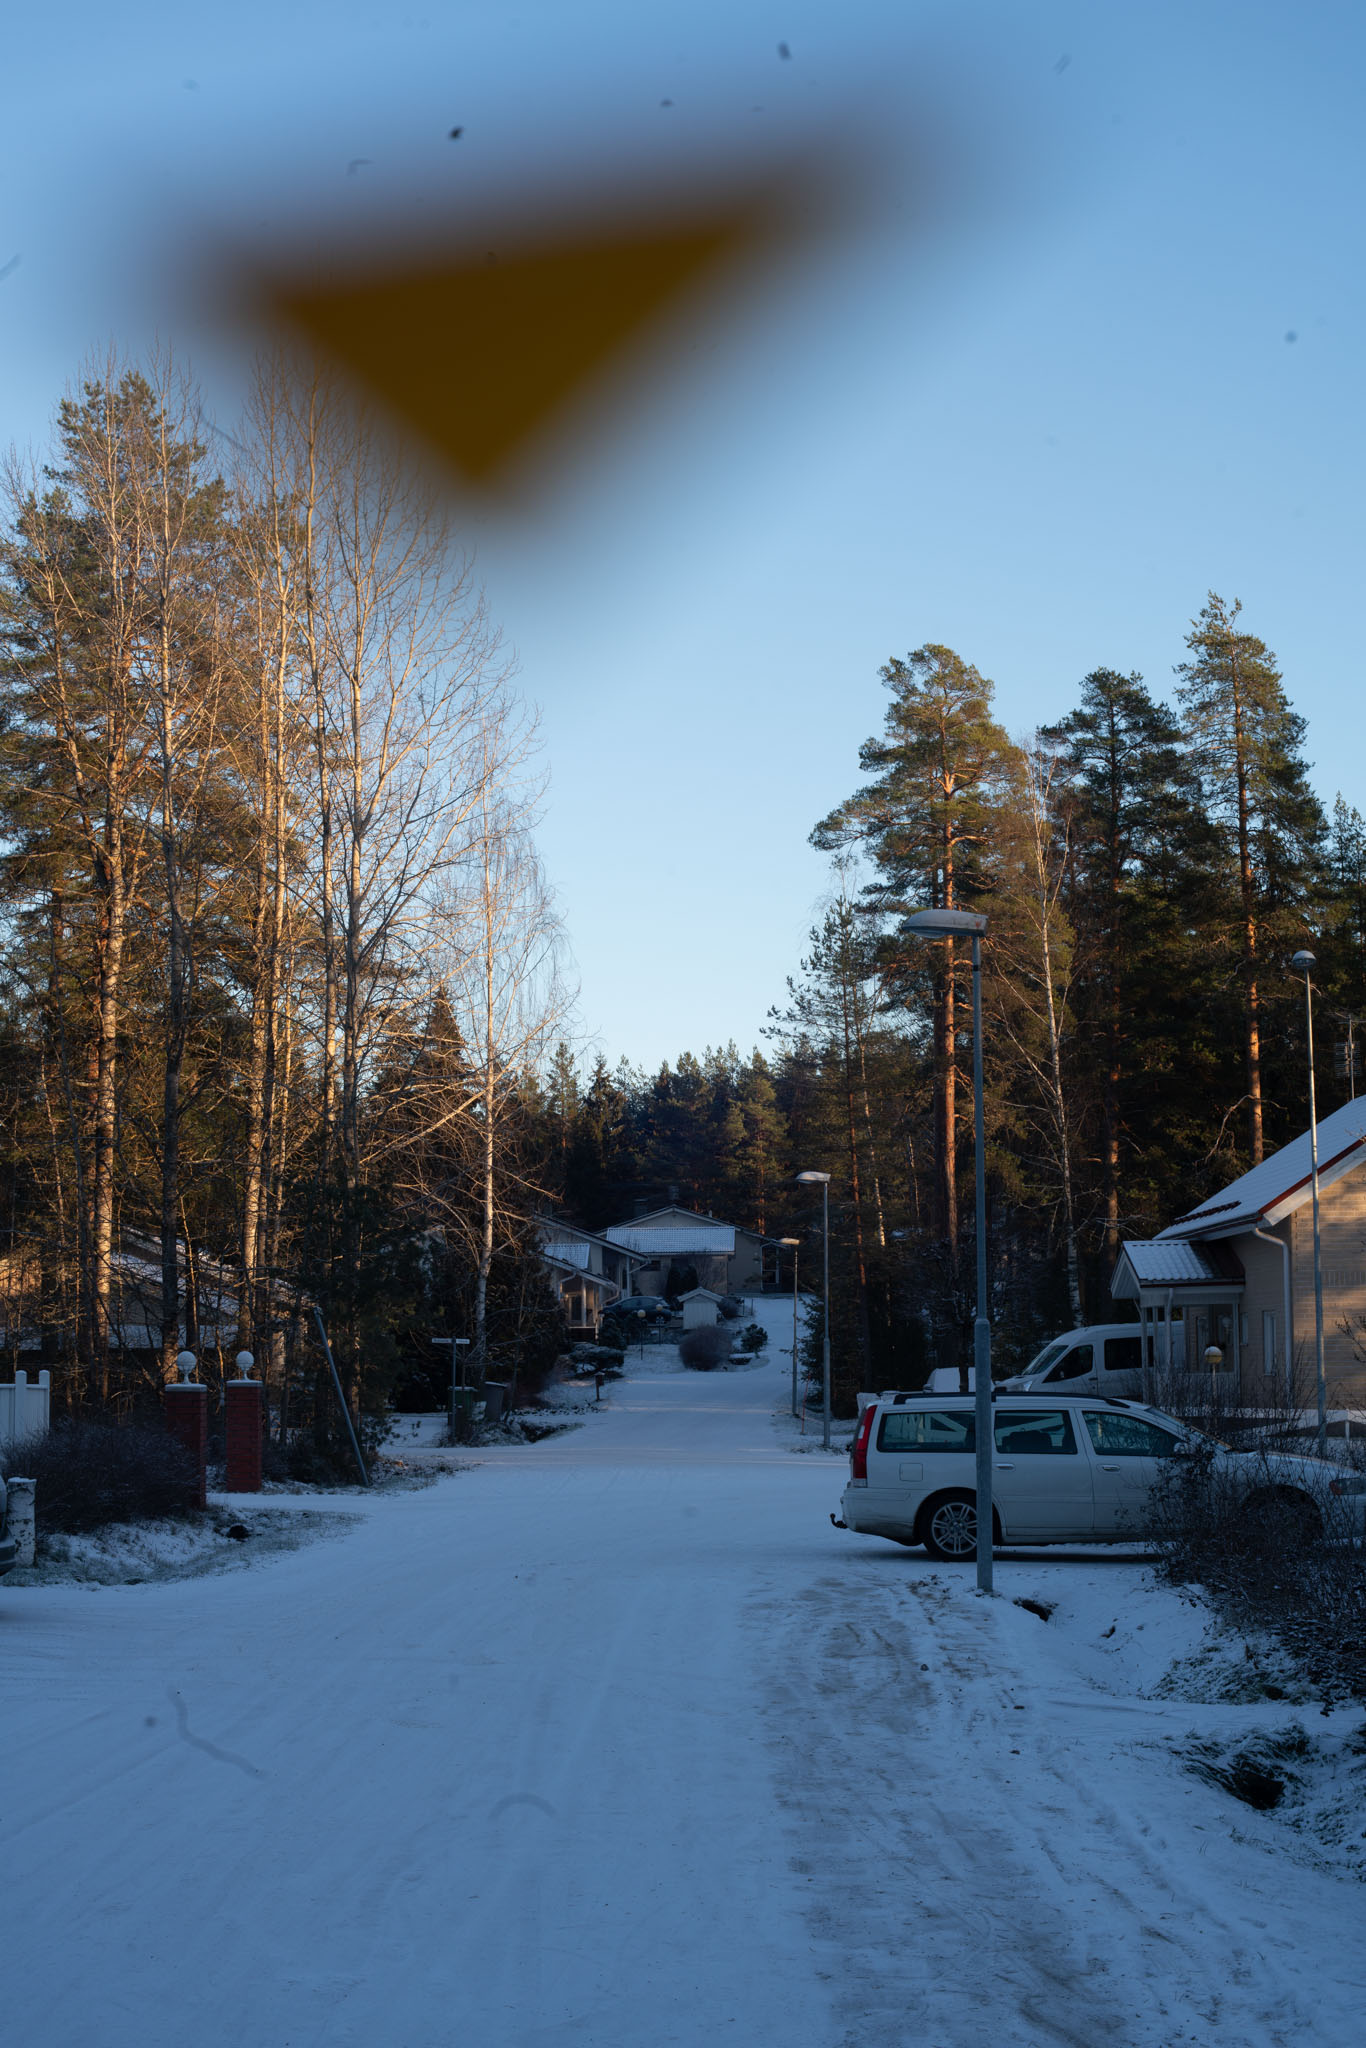
After cutting the post-it in half and in moving it to a significantly more wide-angle lens (in this case a 28 mm f/4 lens), I took another series of shots, this time of a golden hour sunset vista.


Sony ⍺7R2, Topcon UV 28/4 @ f/5.6, 1/200 s, ISO100

Sony ⍺7R2, Topcon UV 28/4 @ f/8, 1/100 s, ISO100

Sony ⍺7R2, Topcon UV 28/4 @ f/11, 1/50 s, ISO100

Sony ⍺7R2, Topcon UV 28/4 @ f/16, 1/30 s, ISO125
Now, not only is the post-it discernible from the even the widest aperture shots, its outlines also become significantly clearer. The change is further accentuated by the somewhat “darker” aperture range of this lens (f/4–f/16 instead of f/1.2–f/16). With ultra-wide lenses (20 mm and shorter), the risk of a larger speck of dust on the front element to show up is quite real.
Remember, however, that the post-it used in these experiments is both immensely larger than the ordinary speck of dust/other stuff which you might have to deal with regularly.
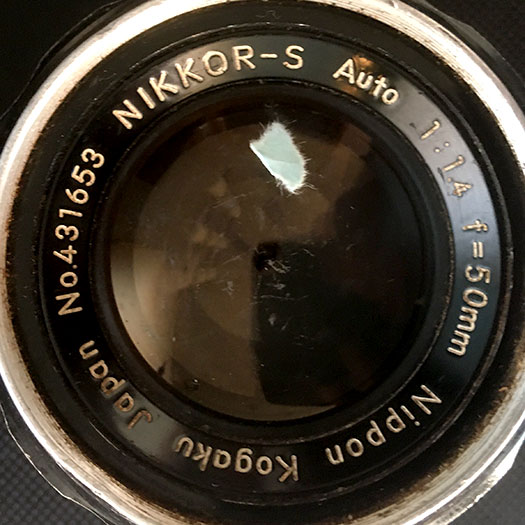
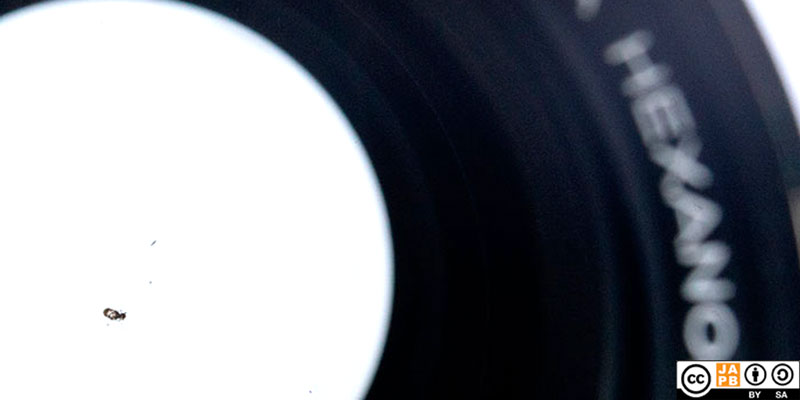
The picture below shows a lens which actually has the remnants of a bug embedded in the optics, and – moreover – relatively close to the optical axis/centre of the lens. Even so, I have never taken a picture with that lens which would have shown that bug.
Other detrimental effects?
We’ve ascertained that normal-size specks of dust or debris in a lens are highly unlikely to show up on the final image. In fact, if you can see specks or dark blotches on your images, they almost certainly are due to dust on the sensor. But this does not mean, that a very dirty lens would not have a detrimental effect on your image quality.
In fact, the first set of images with a post-it covering the centre of the lens already give a hint (especially at f/4 or f/5.6) of the effect dust and debris have on image quality: In principle, every scratch on a lens surface, every speck of dust, and every bug in the lens does lower resolution and contrast. Hence, even when you have a hundred dust motes or scratches on your lens and even thought none of them show up in the final image, they will nevertheless be able to detrimentally effect contrast and sharpness. Whether that effect is noticeable (or real-world relevant) depends on how severely scratched/dirty your lens is.
Because I happen to have two copies of the Nikkor-S (pre-Ai) 50/1.4 and one of them is pristine while the other is badly damaged, I took the opportunity to do a detailed comparison that you can see here.
Moreover, extreme amounts of dust may marginally lessen the amount of light which manages to pass through the lens (leading to longer shutter speeds), and when shooting against strong light sources, extreme amounts of scratches/dust (especially if the dust is reflective) could increase the internal reflections produced in a lens.
When is dust severe?
The real question is: when is some dust “too much dust”? When does my lens’ being dust-filled start to show up? Most importantly, when should I go and have it cleaned? This question is partially determined by a) the intended use of the lens, as well as b) where/how you intend to get the lens cleaned.
As you’ve noticed from the examples above, the effect of even a big piece of debris (such as the post-it) is least discernible when shooting wide open and using longer focal lengths. Hence if your intended use of the lens includes a lot of wide-open shooting, the effect of dust is negligible. Especially in portrait use, dust is nothing to worry about (in the olden days, portraits were customarily shot through silk stockings or with a coating of vaseline added to the front lens, in order to de-emphasise skin texture). If, on the other hand you aim for maximum resolution, and are keen on having your lens draw the picture with as much detail as possible, the threshold for dust becoming ‘too much’ is naturally somewhat lower.
That said, when buying a lens, dust is (IMO) justification for a mild discount. Not so much because of the effect it has on the images, but because people believe it to have such an effect, thus lessening the value you can expect to recoup should you try to sell the lens.
Dust-removal
Again, I recommend you test the lens and try to ascertain signs of dust/debris leading to lowered definition, before embarking on having the lens cleaned. While lens cleaning is not a complicated job for a professional who has the right tools, it still is precision work, and it takes some time. In other words, it’s not gratis.
And while you might think that the equation is significantly different when you intend to clean the lens yourself (It being gratis, you might think the threshold is lower), think again. While the pro will (if they’re worth their salt) return your lens in squeaky clean condition, You will in all likelihood not achieve nearly the same level of result. In fact, you might easily make things worse (and this even without accidentally breaking anything).
The problem with trying to remove dust from within a lens is, that the lens typically is not as dust-ridden as it would seem. When inspecting a lens for dust using a flashlight, you typically see all the dust extremely clearly. On the other hand (unless your office/household has a lot of horizontal glass surfaces) you have very little idea of how dusty your office/household is. Your lens might seem very dusty/dirty compared to the ambient (while in fact being significantly cleaner). When re-inspecting the lens (with a flashlight) after having cleaned the lens, there’s a good chance of you be disappointed with the result.
Therefore, if you intend to open a lens (whether in order to clean it or otherwise repair it), you should do it in the cleanest space you have, clean and de-dust your working surfaces, select clean clothing that preferably is not a source of more dust, and – if you can – have an air-purifier running for a couple of hours before opening up the lens.
Read more:
Previous article: Part VI: Surface Defects
Next article: Part VIII: Miscellaneous Defects
Footnotes
- One basic principle is that the base characteristics (such as focal length) of any collection of lenses are described as if there was only one element, which leads to some counterintuitive aspects. For instance that a wide-angle lens may produce a focal length that is so short (e.g. 17 mm) which – if measured from the middle of the objective – would seem to reside inside the lens itself. Hence, one needs to start to think about multi-element lenses in terms of entrance pupils and exit pupils and pretty soon the concept of focal length – a concept that is so simple and powerful for single-element systems – starts to become a burden rather than an asset. I personally think it would make more sense to not speak of viewing angles (not focal lengths), with respect to the intended sensor/film size (see some more about the topic here).
What is most befuddling is that lenses composed of several lens elements work in a somewhat unexpected fashion, that the final image (what appears on your sensor/film or optical viewfinder) is not the product of any single lens element, but is the sum total of all the lens elements in conjunction with the flange focal distance. It is an equation where each element must hold true. ↩︎ - I suspect that many of the misconceptions on how lens elements work are based on that a) our paradigm of lenses are based on eyeglasses, magnifying glasses, etc. (i.e. one-element lenses), and b) that our paradigm of films/sensors is based on the (erroneous) idea that the film/sensor is equal to our eyes.
While there certainly are parallels (lens, pupil, retina <==> lens, diaphragm, sensor), the most important differences are 1) that our eye’s lens is based on a single lens whereas a photographic lens uses several lens elements; 2) the image we see is more dependent on out brain than it is based on our retinas.
Also, whenever we view any optical assembly (like when we look through a lens) we are adding one lens (the one in our eyeball) to the designed equation. Hence, what we see when looking through a lens is utterly different from what that lens produces onto a film or sensor. ↩︎